DIY how to fix a window draft: As much as 50% of your home’s heating and cooling energy can be lost through your windows. That is why it is so important to make sure that you do anything you can to minimize or eliminate any drafts that you may have. Not only will you feel more comfortable, but you will also save money on your energy bills. If you are interested in installing new energy efficient window treatments in your home, contact Graham’s & Son today for a free in-home consultation.

DIY How to Fix a Window Draft
There are several things that you can do yourself in order to fix a window draft. Some of them are more time-consuming but each one is relatively simple for even the beginner do-it-yourselfers.
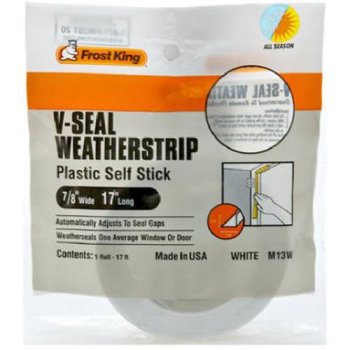
1. Install Self-Adhesive “V”-Strip Weatherstripping
There are several different types of weather stripping. One of the easiest to install is the self-adhesive “V” weather stripping. It is very durable and invisible once it is in place. You can use it on double-hung or sliding windows.
Step 1: Using a damp rag, carefully clean the surface of your window where you plan to apply the weather stripping. Allow the surfaces to completely dry before you begin application.
Step 2: Use a measuring tape to determine the length that you will need for each section of your window or hold up the strip to the window and cut a piece slightly longer than you will actually need. You will need strips for:
- each of the 4 sides of the inner sash
- each of the 4 sides of the outer sash
- the bottom of the inner sash
- the top of the outer sash
- the outer meeting rail
Step 3: Lift up the inner sash all the way to the top. Peel away the backing of your first strip, which will go along the window jamb, leaving about one inch of backing at the top of the strip. You will find that it will be easier to work with this strip if you leave this thin amount of backing attached as you will eventually have to push the strip in between the sash and jamb. Carefully press the strip in place with the “V” facing inside.
Step 4: Repeat step 3 to install a strip on the opposite side of the window jamb.
Step 5: Close the window. The piece of tape that still has the backing attached should now be sticking out at the top of the sash. You can now remove this backing and press it into place.
Step 6: Lower the upper sash as far as it will go and install the weather stripping by repeating steps 3 &4.
Step 7: Raise the inner sash again and apply the weather stripping to the bottom. Lower the outer sash and apply another strip to the top.
Step 8: Lower the outer sash until the outside face is exposed. Clean and dry this surface. Apply one final strip of weather stripping to the outer face with the “V” facing down.
The following video will visually demonstrate the above steps.
2. Apply Window Caulking – Inside and Outside
If your windows are older or poorly sealed you may need to caulk them. This will help to prevent drafts from entering your home.
Step 1: Get the following tools and supplies:
- putty knife or scraper
- utility knife
- long nail or wire hanger
- tube of caulk and caulk gun
- small plastic spoon or ice cream stick

Step 2: Use your putty knife or scraper to peel away any old paint or caulking around your window.
Step 3: Insert your tube of caulk into your caulk gun and cut off the tip on the end of the tube. Make the cut large enough so that it will give you a bead that will fill the crack completely. Usually, a 1/4″ bead will be large enough to fill most cracks.
Step 4: Puncture the seal in the caulk tube by inserting the end of your hanger or nail into the nozzle until you feel it puncture. This will allow the caulk to flow.
Step 5: Using continuous light pressure on the gun trigger, apply a bead of caulk along the crack. Apply caulk to all four sides of the window to seal the crack.
Step 6: Using the plastic spoon or ice cream stick, smooth along the bead of caulk to create a smooth surface. Clean off any excess caulk on the tube or your hands before it dries.
The following video will visually show you how to do the above steps.
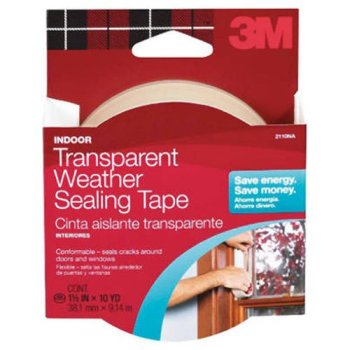
3. Use Weather Sealing Tape
Weather sealing tape is an inexpensive way to seal cracks around your windows. It is moisture resistant and shrinks tight for a wrinkle-free, clear finish.
Step 1: Clean and dry all the surfaces where you will apply the tape.
Step 2: Carefully place tape along the cracks around your window where drafts are coming in. The tape is very flexible so it will easily conform to any angle or curve.
Step 3: When you need to remove the tape, it will come off easily with very little or no evidence of it having been used.
4. Use Nail Polish
Using nail polish may seem crazy, but it is a very inexpensive, albeit temporary, solution to your drafty windows.
Step 1: Carefully apply clear nail polish over any cracks that you can see around your windows.
Step 2: Wait for the polish to dry. It will fill the crack almost invisibly and once it is hard it will effectively seal the crack.

5. Purchase Window Snakes
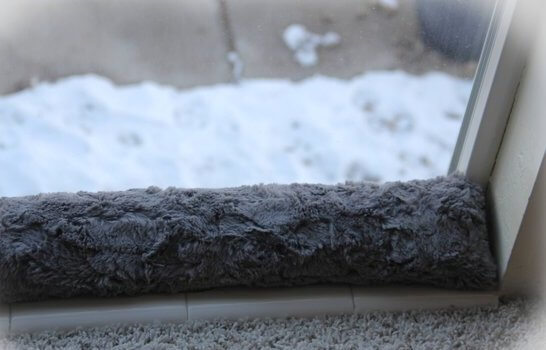
If your window is drafty along the bottom and you want a temporary fix, you can purchase a window snake. Window snakes can be a fun and decorative way to stop drafts at the bottom of windows or doors. The design shown in the picture here is made of faux fur.
6. Purchase Energy Efficient Window Treatments
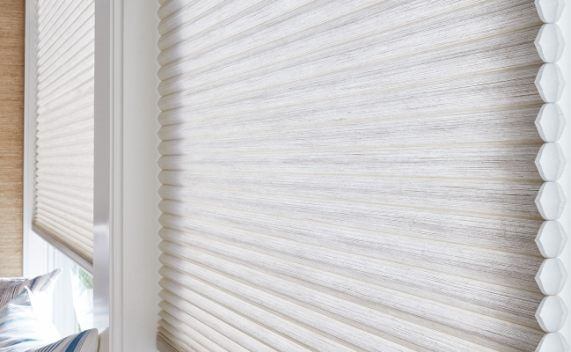
Investing in new window treatments for your drafty windows will not only improve the look and style of your room, but choosing the right kind can help to cut down on drafts and lower your energy costs.
Cellular shades have a special honeycomb construction that traps air in distinct pockets. These pockets act as an effective layer of insulation that can greatly lower your energy consumption and bills.
If you prefer curtains on your windows you can also choose from a wide selection of liners that will not only protect your drapery fabric from UV damage but will also insulate your windows and cut down on any annoying and costly drafts.

Step 1: Contact Graham’s and Son today to book your free, in-home consultation.
Step 2: With the help of Graham’s window treatment expert, you can choose the perfect window covering that will complement your room and cut down on costly drafts.
Step 3: Sit back and let Graham’s do the professional installation of your new window treatments for you.
Step 4: Enjoy the beauty and the added savings.
How to Find Out Where the Drafts Are Coming from
There are a couple of easy things that you can do to find out where the air is coming in or escaping from your windows. The following video demonstrates how you use a lighter or a piece of tissue paper to find out exactly where the leaks are.
Why is Graham’s & Son #1 for Window Treatments?
Graham’s & Son knows window treatments; we have been in the window treatment business for over 40 years. Our expertise and professionalism are second to none. In addition, right now we are offering an amazing deal on all our blinds, shutters, and shades – when you purchase any two, you will get a third absolutely free.

Our customers have been so pleased with the high standard of our work that they selected us for the “Best Business Service – Interior Decorating: Platinum” and “Best Shopping – Kitchen Renovations: Gold” awards in the 2017 Cambridge Times Readers’ Choice Competition. Book a free in-home consultation today and find out for yourself why Graham’s is the best in the interior design business. Contact us today to schedule a free in-home consultation. If you prefer, you can shop at home. Browse through our website, make your choice, and simply give us a call at 519-658-9025 to place your order without ever having to leave the comfort of your own living room.
“We recently had California shutters installed in our bow window in the living room and a roller blind in our dining room. In both instances, Matthew was wonderful with suggestions and ideas. The installations were great and the results outstanding. We can’t say enough about the staff at Graham’s and Son Interiors and the final result was beyond expectations. We look forward to working with them again in the spring for flooring. Thank you!“
Susan Ashley
Read more customer testimonials
 |
 |

