If you want to learn how to fix a roller blind that won’t go back up, here are the steps to follow. Click on the situation that best suits your issue or type of blind.
If you are looking to replace a roller blind that won’t go back up or any other type of window treatment, contact us.
How To Fix a Roller Blind That Won't Go Back Up
1. Basic Roller Blinds
Learn how to fix a roller blind that won't go back up
If you have a basic, inexpensive roller blind that you can manually raise and lower, take the following steps to fix it.
Step 1: Lower your shade all the way down to the bottom. Step 2: Remove the shade from its brackets. Step 3: Re-roll your shade tightly back up. Step 4: Re-install your shade into its brackets. Step 5: Test the shade to make sure that it is working properly. If you are still having an issue, you may have to repeat the steps a few times.
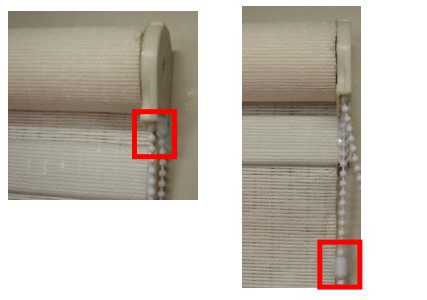
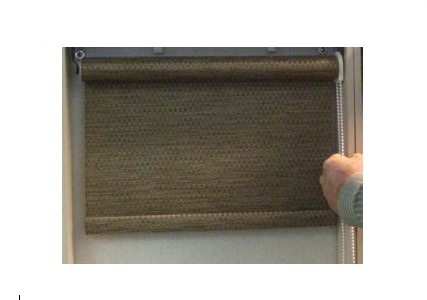
2. Roller Blinds with Connector Bead Against Clutch
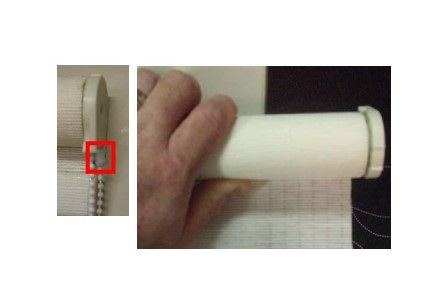
If your roller blind has a connector bead that rests against the clutch, then these beads may be out of position causing your blinds to not operate properly. Take the following steps to fix this issue.
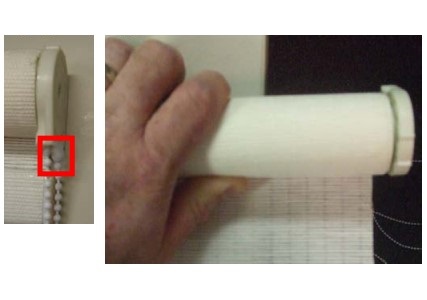
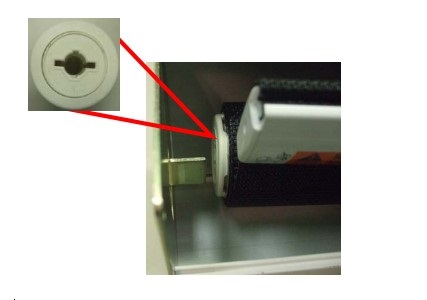
Step 1: Raise the blind up completely until all of the material is wrapped around the roller or until your chain stops.
Step 3: Remove your blind from its installation brackets. You can do this by first swinging the bottom of the metal level located on the non-control end towards you. Lift this end out of its bracket and then lift the other end out of its bracket.
Step 4: Manually wrap up the all of the material on your blind until it is fully raised. It’s best to roll your shade up on a clean surface with the clutch end hanging out the edge to protect it.
Step 5: With your blind completely rolled up, re-install it. Place the contol end back in its bracket first followed by the other end. Make sure that the latch on the non-control end is open when you are replacing it. Once you shade is in place, close the lever to keep your shade in place.
3. Roller Blinds with Connector Bead Not Against the Clutch
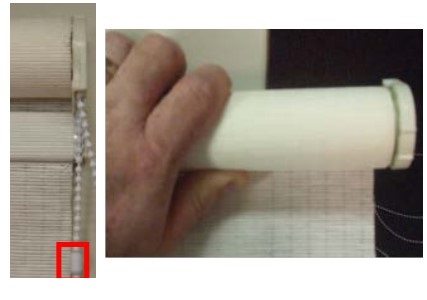
Sometimes the connector bead can become displaced and is no longer resting against the clutch. This can cause roller blinds to not go back up properly. Take the following steps to fix this issue.
Step 1: Raise your blind up completely until all of the material is wrapped around the roller or until your chain stops.
Step 3: Remove your blind from its installation brackets. You can do this by first swinging the bottom of the metal level located on the non-control end towards you.
Lift this end out of its bracket and then lift the other end out of its bracket.
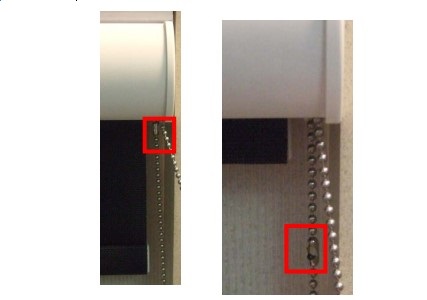
Step 4: Manually unroll the material on your blind one revolution. Pull the chain until the connector bead is against the clutch or the hem bar is against the roll.
Repeat this process as necessary until the bead chain is properly against the clutch. Once the chain is in the right position, roll it completely up. If you have a larger blind, you may need to get someone to help you roll and install it.
Step 5: With your blind completely rolled up, re-install it. Place the control end back in its bracket first followed by the other end. Make sure that the latch on the non-control end is open when you are replacing it. Once your shade is in place, close the lever to keep your shade in place.
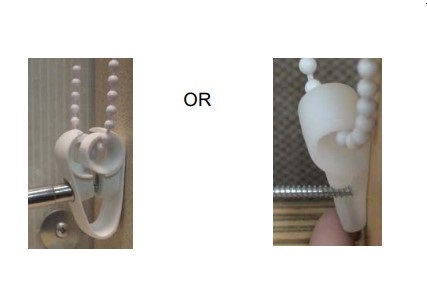
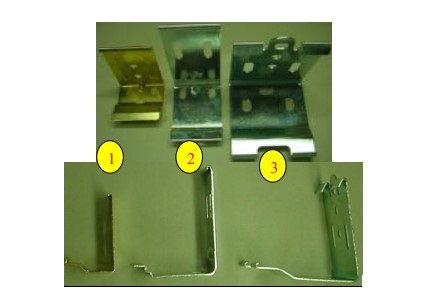
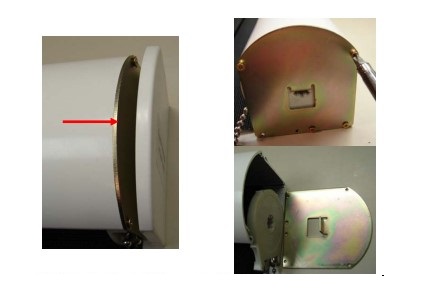
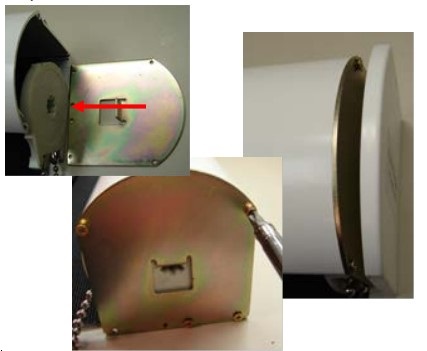
Step 4: Take a look at the bracket type that you have. The image shows three different types of brackets.
If you have the third style, then you will need to contact your manufacturer for assistance. If you have either of the other two types of brackets, you can continue with the following steps.
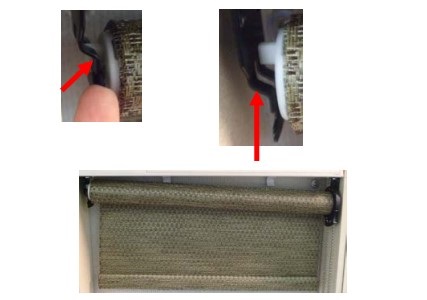
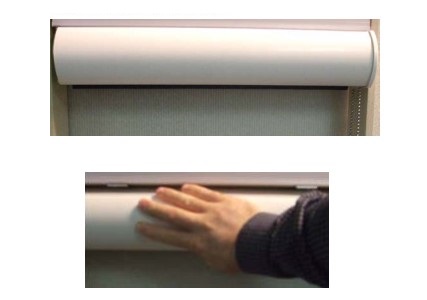
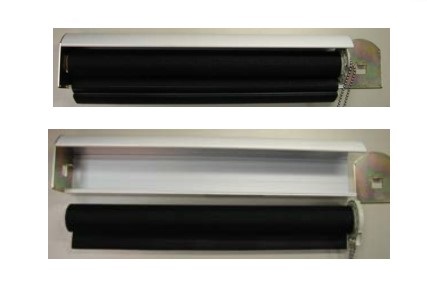
Step 5: Remove the end cap from the control end. You can do this by pulling away from the cassette valance. Remove the end plate from the cassette by unscrewing all four screws and then pull it away from the cassette valance.
Step 7a: If you see that the connector bead is against the clutch then manually wrap up the all of the material on your blind until it is fully raised.
Step 7b: If the connector bead is not against the clutch, then do not manually unroll the material on your blind one revolution. Pull the chain until the connector bead is against the clutch or the hem bar is against the roll. Repeat this process as necessary until the bead chain is properly against the clutch. Once the chain is in the right position, roll it completely up.
Step 8: Keep the shade completely rolled up and re-install it into the cassette valance. Make sure you align the non-control end with the tab on the end plate. You might need to spin the inside of the mom-control end to align the slot with the tab on the end plate.
Step 9: Re-attach the end plate from the cassette. You can do this by lining up the inside tab with the clutch end cavity. Line up the screw holes and tighten all four screws. Line up and snap the end cap back onto the end of the cassette valance.
Step 10: Re-install the shade back into its brackets. You can do this by pushing back on the cassette valance and then rolling the front of the valance upwards. Once the front of the cassette valance catches the brackets, release the pressure.
If your roller blind won’t go back up, the problem probably has to do with the roller mechanism. Roller blinds are designed with a strong coil spring located inside one end of the roller. There is a flat pin that holds the shade up at this end of the roller. The job of this pin is to tighten or loosen the spring as you roll the shade up and down.
The spring is controlled by a pawl and ratchet that are also located at the end of the roller where the pin is. They stop the spring from moving when the shade is released. If your shade becomes too loose or too tight or if it won’t stay in place when it is released, then the problem is often with the spring itself or the pawl and ratchet device.
Another reason why your blinds won’t work properly is that the spring itself is broken. If that is the case, then you will need to replace the spring.
Looking to Replace Your Old Window Treatments? Contact Graham's & Son
If you are looking to get new window treatments installed, contact us.
With over 40 years of experience in the industry, Graham’s & Son Interiors offers a wide selection of custom window treatments as well as full bathroom and kitchen renovations and other services to enhance your home, like flooring and upholstery.
If you live in the Tri-City region of Cambridge, Kitchener, Waterloo or any of the surrounding areas like Guelph, choose Graham’s. With Graham’s, you will receive quality workmanship and installation, friendly service and expertise.
“We had an extensive home renovation completed by Graham’s & Son Interiors. The finished product is an amazing transformation which came alive with the help of the design team and especially the very hard work done professionally by their contractor.” – Jacquelyn W.