
Getting Clean Window Treatments is Easy
Learn How
Learn how to clean window treatments, no matter what type you have. Here are easy-to-follow, step-by-step instructions to make cleaning a breeze.
Not a fan or don’t have time to clean window treatments yourself? Graham’s & Son can clean, repair, and do alterations on all types of window treatments for you. Contact us today to set up an appointment.
Want Clean Window Treatments? Here's How
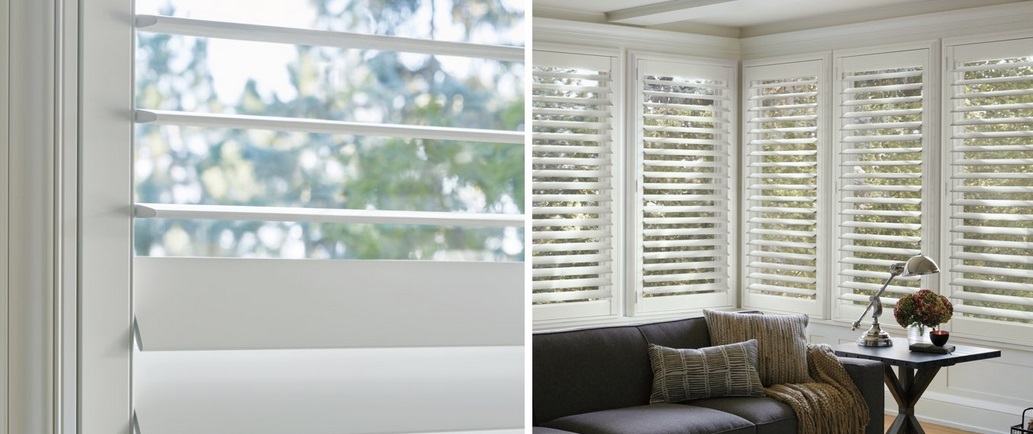
Chapter 1: Shutters - California & Plantation
Light Cleaning for All Shutter Types
If this is your first time attempting to clean window treatments like shutters, don’t worry. Shutters are one of the easiest window treatments to clean. Unlike curtains or other fabric window treatments, you don’t need to take down your shutters in order to clean them; nor do they need to be professionally cleaned.
You should do a light cleaning at least once a week or more often if your have pets that shed or during pollen season especially if you suffer from allergies.
There are 2 methods for performing a light cleaning of your shutter by hand and another for cleaning your shutters using a vacuum.
By Hand: Method 1
Step 1: Open up your shutters fully.
Step 2: Take a clean, dry cloth or duster (one that won’t shed fibres, such as a microfiber cloth) and lightly dust the slats of your shutters.
Step 3: Start at the top and work your way down. If you start at the bottom and work up, then the dust from the upper slats may fall on the ones that you have already dusted below.
Step 4: Work from the centre of each slat, moving towards the sides. Be careful not to press down too hard or you may damage the slats.
Use a soft cloth or duster to lightly clean your shutters weekly
By Hand: Method 2
Step 1: Take a microfiber cloth and hold it in your hand in a “C” shape.
Step 2: Open the louvers and cup your hand around one louver (your thumb will be under the louver and your finger above).
Step 3: Gently squeeze your thumb and fingers together while you run your cloth across the shutter. This technique will allow you to clean both the top and bottom of the louver at the same time.
By Vacuum:
Step 1: Attach the soft brush or upholstery attachment onto your vacuum. If you don’t have an upholstery attachment, you can stretch a nylon stocking over the hose instead
Step 2: Start at the top of your shutters and slowly work your way down to the bottom.
Step 3: Move from the center of each slat out towards the sides.
Tip: If you don’t have a soft brush attachment, or have lost yours, you can purchase a replacement. Most of these parts are a standard size and can be purchased online or at retail outlets such as Home Depot.
Deep Cleaning Wood Shutters
Learn how to make your own beeswax polish for deep cleaning your wood shutters
Step 1: Do a light cleaning of your shutters to remove any excess dust and debris.
Step 2: Lightly spray a soft toothbrush with furniture polish (if possible, choose a brand that contains beeswax).
Step 3: Gently remove any dirt or debris that is lodged in the corners or in any grooves or crevices in the wood.
Step 4: Quickly wipe off your shutters or go over them again with the vacuum cleaner.
Step 5: Spray the wood again with a generous amount of polish and rub the slats until they are shining. Your wood will thank you, and the shutters will look brand new once again.
Tip: Never use water to clean your wood shutters. Too much moisture will damage and warp your wood shutters.
Deep Cleaning Vinyl Shutters
You can use water to clean your vinyl shutters
Step 1: Do a light cleaning of your shutters to remove any excess dust and debris.
Step 2: Use a soft toothbrush to dislodge dirt or debris from the corners of your vinyl shutters.
Step 3: Unlike wood, you can use water on your vinyl shutters. Most dirt on vinyl shutters can be removed by wiping the slats with a damp cloth.
Step 4: Mix up and use a solution of water plus a little dish detergent for more stubborn dirt and stains.
Greasy Shutters: If you find that your kitchen shutters are greasy, purchase a cleaning agent that works well on grease. A little baking soda sprinkled on a damp cloth also works really well on grease. Once you have wiped the slats with the baking soda, use a clean damp cloth and go over them once more to remove any residue.
Deep Cleaning Composite Shutters
How to Prevent/Fix Shutters that Have Turned Yellow
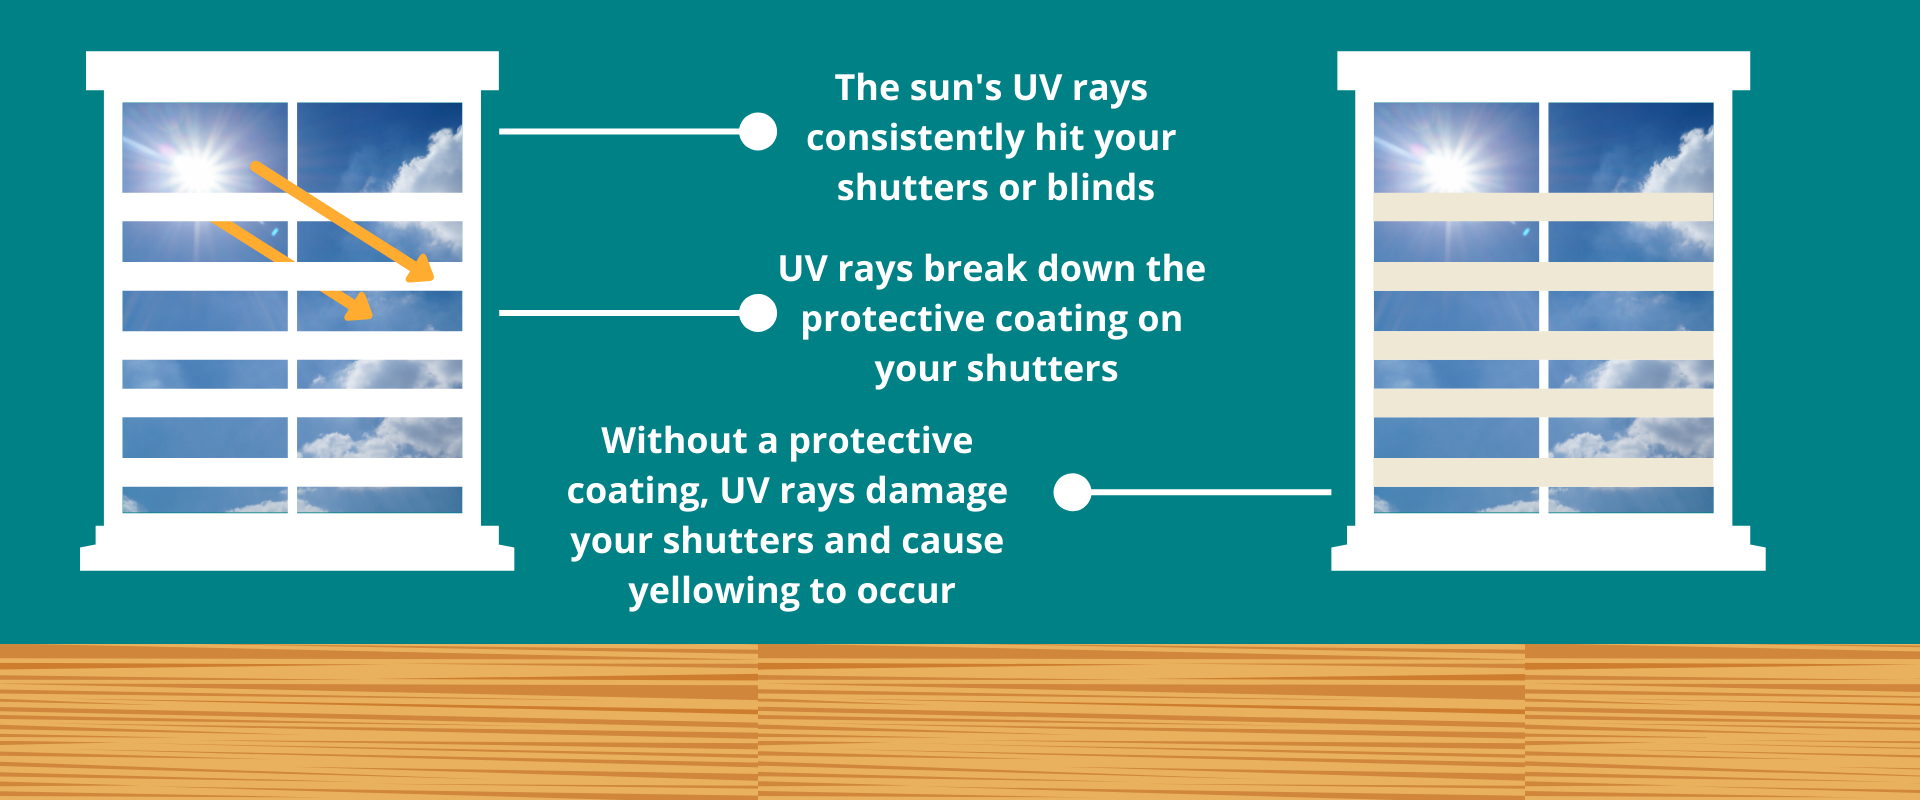
The sun's UV rays can turn your white shutters yellow
If your white shutters or blinds have been exposed to the sun’s UV rays for a long period of time, they may start to turn yellow. There isn’t really anything that you can do to totally prevent this, however, you can help to prolong the life and look of your white shutters by regularly cleaning them.
Dust and dirt build-up on your shutters can actually make them look more yellow than they really are. Regularly cleaning your shutters will help them look better. Cleaning your shutters can help to prevent any further discolouration, however, it can’t reverse any yellowing that has already occurred. Follow the steps above for deep cleaning your shutters.
Chapter 2: Blinds
General Instructions for All Blinds
Dusting: It is a good idea to dust your blinds about once a week with a feather duster to help keep them looking new.
Vacuuming: Going over your blinds with your vacuum using the upholstery attachment will give them a deeper cleaning. You should do this once a month. If you don’t have an upholstery attachment for your machine, you can securely attach a nylon stocking over the end of your hose to safely clean your blinds.
Spot Cleaning: For blinds that are safe to spot clean, you can do the following to remove any stain. Using a soft cloth or sponge dipped in mild detergent and warm water, gently blot the affected area. Allow it to dry completely.
Vinyl Horizontal Blinds
See how to clean your blinds without taking them down
Step 1: It is safe to clean your vinyl blinds with a mixture of mild soap and water.
Step 2: You can either clean them while they are up or take them down and immerse them in water. You can immerse them in a large sink or your bathtub depending on the width.
Step 3: If you would also like to help eliminate static electricity build-up, coat the vanes with a thin layer of a mild detergent.
Wood Blinds
If you have wood blinds that have a painted or stained finish, clean them with a spray polish such as Pledge, using a soft cloth. Never use water on any wood products as it will damage it.
Metal Blinds
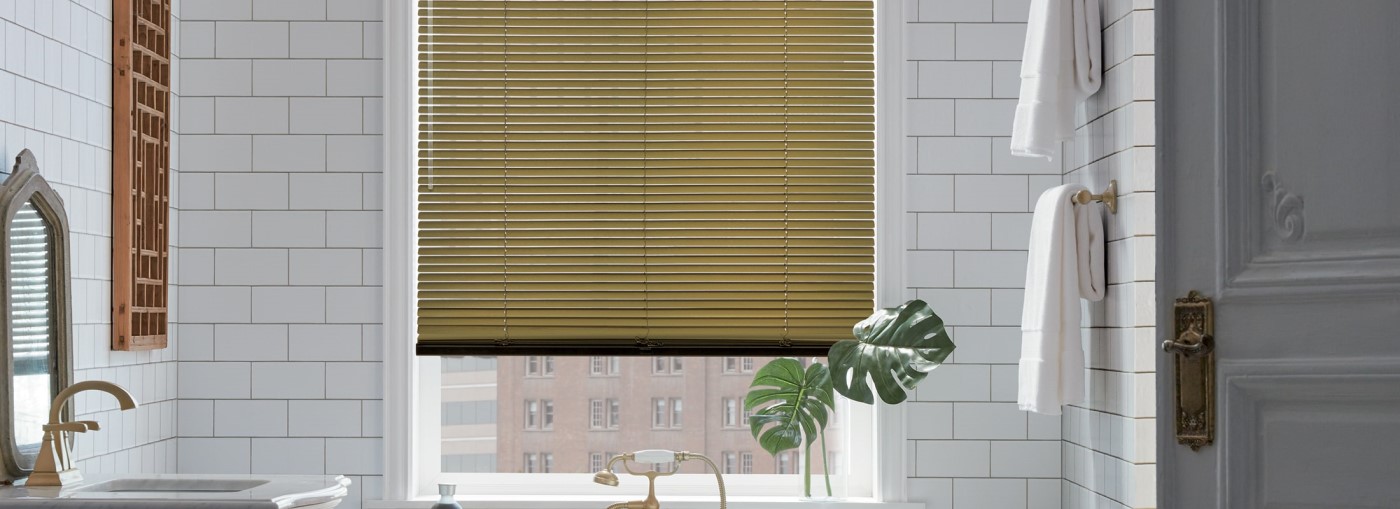
Metal blinds can be cleaned while they are still up or you can take them down
Step 1: Give your metal blinds a bleach bath. Fill up your bathtub with cold water and add 2-3 cups of bleach to it.
Step 2: Remove your blinds from the wall and gently place them in the bathtub. Make sure you completely submerge all of your blinds so that they will get evenly cleaned.
Step 3: Soak your blinds for at least 10 minutes and then check on them. If you are pleased with the colour, remove your blinds from the tub and wipe them thoroughly with a clean towel.
Note: The slats are fragile so be careful not to bend them while you are drying them.
Step 4: After you wipe them off, you can hang them back up and let them air dry.
Fabric / Sheer Vertical Blinds
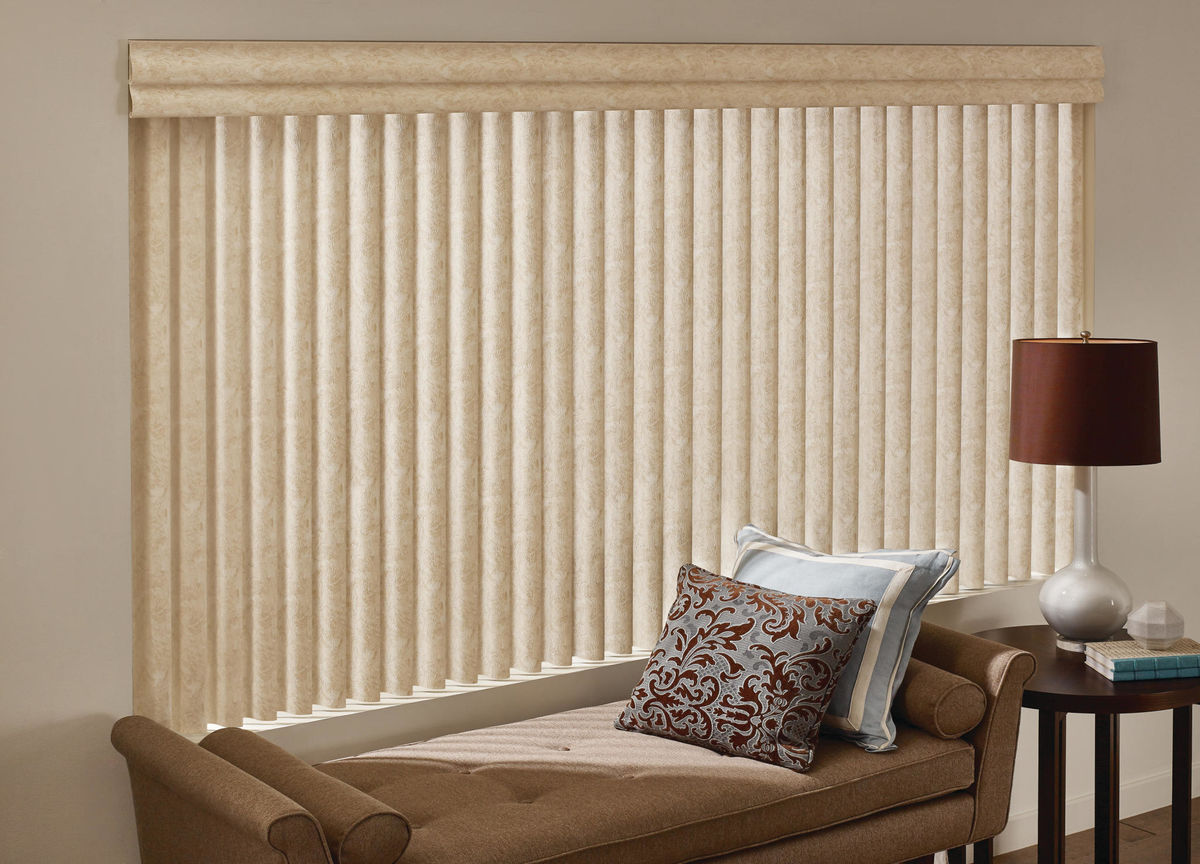
You can wash your vertical blinds on the gentle cycle
Step 1: You can machine wash on the gentle cycle most sheer vertical blinds. Check with your manufacturer first though to make sure.
Step 2: Be sure to use warm water and a mild detergent. Never use chlorine bleach on them.
Step 3: Hang the damp fabric on the louvres and reshape them. Leave them to air dry in the open position.
Note: During the manufacturing process, sheer fabrics are steam pressed. You may find that they need to be steamed again at a low temperature before you hang them up. Make sure you remove the fabric from the vanes before you steam them. You should not, however, iron out the permanent pleats in them.
Vinyl Vertical Blinds
Step 1: It is safe to clean your vinyl vertical blinds with a mixture of mild soap and water.
Step 2: The vanes on your vinyl vertical blinds can be taken off and then immersed in water to clean them.
Step 3: If you would also like to help eliminate static electricity build-up, coat the vanes with a thin layer of a mild detergent.
Chapter 3: Shades
General Instructions for All Shades
Dusting: It is a good idea to dust your shades about once a week with a feather or microfibre duster to help keep them looking new.
Vacuuming: Going over your shades with your vacuum using the upholstery attachment will give them a deeper cleaning. You should do this once a month. If you don’t have an upholstery attachment for your machine, you can securely attach a nylon stocking over the end of your hose to safely clean your blinds.
Spot Cleaning: For shades that are safe to spot clean, you can do the following to remove any stain. Using a soft cloth or sponge dipped in mild detergent and warm water, gently blot the affected area. Make sure that you are very careful not to crush or wrinkle the material. Allow it to dry completely.
Cellular Shades
Because of their unique construction, cellular shades need special care when cleaning. Mild detergents like Woolite spot remover and dry cleaning may damage your cellular shades.
If you need to get them deep cleaned, it is recommended that you get a professional company to clean them for you.
Learn how ultrasonic cleaning is done
The above video will show you how blinds are cleaned using an ultrasonic cleaning process.
Pleated Shades, Roman Shades, Solar & Roller Shades
Similar to cellular shades, pleated, Roman, solar, and roller shades have are made with a special construction and materials. Because of this it is best that you only do general light cleaning on them. Check with the manufacturer’s instruction to make sure that they are okay to spot clean as well.
For deeper cleaning, contact a professional.
Chapter 4: Drapes
Drapes
It’s not too difficult to clean window treatments like drapes, but it does take some time. Here are the steps to take.
Light Cleaning
Daily: Once a day, it is a good idea to give your drapes a gentle shake. This will help to remove any dust that has accumulated during the day.
Weekly: Once a week you should vacuum your drapes as follows:
Step 1: Attach the soft brush attachment to the accessory hose on your vacuum cleaner.
Step 2: Set your vacuum to a reduced suction setting or, if it doesn’t have this option, place a knee-high nylon over the nozzle to make the suction more gentle for your fabric.
Step 3: Using a gentle sweeping motion, move the brush up and down, over the surface of the fabric. Be careful not to pause too long over one section as the material may be pulled into the hose and damaged.
Learn how to vacuum your drapes
Note: A hand-held vacuum like a DustBuster also works well for cleaning drapes.
Steaming
Steaming is good for cleaning your drapes and for removing any deep wrinkles. Here’s how to do it.
Step 1: Turn on your steamer and wait until it warms up.
Step 2: Move the steaming wand in an up and down motion, taking your time. As you move along the material, you will notice the wrinkles disappearing.
Step 3: Make sure that your hose doesn’t go below your water level or the machine will shut off.
Step 4: Pull the material tighter as you move along the seams.
Machine Wash

Some drapes can be machine washed
Before machine washing your window coverings, you should remove any excess dirt and debris. You can do this by:
- Vacuuming your drapes following the instruction above
- Once you have removed them from the window, lay them flat on the floor and vacuum them there
- Shake your drapes outside if you don’t want to vacuum them
Step 1: Take down your drapes from the rods being careful not to pull or tug on the drapes, as this might damage the fabric or dislodge the rods from the walls.
Step 2: Remove any pins or hooks that have been attached to the fabric to hang them.
Step 3: Wash one panel at a time. Turn your machine to the gentlest cycle, set it for a cold water wash, and use a gentle detergent
Step 4: Take the panel out of the machine as soon as it is finished to help prevent wrinkling.
Step 5: It is best to hang your drapes up to dry. Place old towels underneath them to protect your floors from any excess dripping water.
If your labels say that they are dryer safe, you could put them in a dryer on low or on the no heat setting, one panel at a time.
If you have an outdoor clothesline, you could use that to hang up your drapes for drying.
If you have two parallel lines for hanging clothes, drape them over the two so that two sides are not overlapping.
Handwashing
More delicate fabrics should be hand washed
If your drapes are made of wool, cotton, or sheer fabrics such as lace then they are probably more suited to hand washing. Check your manufacturer’s label before beginning to see if it says hand wash only. Here’s how:
Step 1: Fill your sink or bathtub with cold water and add one teaspoon of liquid dish detergent or a gentle fabric soap such as Woolite. Make sure you have enough water to completely submerge your drapes.
Step 2: Place one panel in the water and let it soak for about 10 minutes.
Step 3: Gently swirl the panel around to remove any dirt or debris.
Step 4: Drain the water and refill the sink or tub with clean water. Swirl the panel around to remove all of the remaining soap.
Step 5: If necessary, rinsed it again with clean water to make sure that all of the detergent has been removed.
Step 6: Gently squeeze out the excess water. Avoid wringing out the water as this may damage the material.
Step 7: Hang your drapes back up to dry. Place some old towels on the floor underneath them to soak up the water that drips down.
Sheers

You should clean your sheers more often than drapes
Sheers need to be cleaned more often than heavier drapes. They will discolour if you wait too long between cleanings. Most sheers are made of either nylon, polyester, or cotton so they usually are machine washable and dryable. Here are the steps to follow:
Step 1: Check your manufacturer’s label for any special washing instructions and make sure you follow them.
Step 2: If there isn’t a label, then wash them in warm water on a short, gentle cycle using a gentle detergent such as Woolite.
Step 3: Dry your sheers on low heat for approximately 15 -20 minutes until they feel dry to the touch.
Step 4: Take them out of the dryer immediately to prevent wrinkles.
Step 5: Hang them back up immediately so that you won’t need to iron them.
*Note: If your sheers are older and are showing signs of sun damage (they feel even thinner to the touch or are beginning to fray in places) then you should hand wash them instead of putting them in a machine. You can use the same instructions for handwashing drapes.
Valances

Valances get dirty quickly
Valances attract dust and dirt like crazy but they are difficult to remove and expensive to have professionally cleaned. Try the following to clean them yourself:
Step 1: Cover the nozzle of a hand-held vacuum with a knee high stocking to decrease the suction power.
Step 2: Using a step stool, vacuum the top, flat surface of the valence or board.
Step 3: Hold the fabric on the front of the valance or swag taut with your free hand and gently work the nozzle into all of the folds and pleats.
Step 4: If the fabric still looks dull, use a hand-held garment steamer and go over it to gently clean. If you don’t have a steamer, you can use a steam iron and shoot a blast of steam on to the fabric from a few inches away.
Drapes with a Rubber Backing
If your rubber drapes are suitable for machine washing then follow these steps:
Step 1: Wash one panel at a time on the gentle cycle, using cold water and a gentle detergent.
Step 2: It is especially important to remove rubber backed curtains immediately from the washing machine as prolonged exposure to moisture could cause mildew to form on the rubber backing.
Step 3: If your drapes are too bulky for your own washing machine, consider taking them to a laundromat to use their commercial-sized machines.
No Time or Desire to Clean Window Treatments? Contact Graham’s & Son
If you don’t have the time or are afraid to clean window treatments in case you mess them up, Graham’s & Son offers professional drapery cleaning at reasonable rates.
If you would like to replace your old window treatments with new ones, contact the professionals at Graham’s & Son. Graham’s & Son has been selling and installing custom drapes, blinds, shades, and shutters in Cambridge for more than 40 years.
We are locally owned and operated and we can provide you with gorgeous and practical window treatments for any room in your home. We will give you expert advice, quality, custom-made products, and top-notch customer service.
“I had Graham’s and Son make a custom drapery for my daughter’s room. It was a great experience since they provided a quality product for a reasonable price. I’m very happy with my purchase and would highly recommend their services! Thank you very much!”
-Tanya P.